How to Hang Pictures without Nails


Pictures and artwork are a wonderful way to put your own unique stamp on your home décor. But hammering nails into the wall can be a bit of a daunting task – and one that’s likely to damage your walls.
Luckily, we’re here with a simpler, less stressful solution.
In this step-by-step guide, we’ll show you how to hang pictures without nails and show you the best fixings to use for minimal damage to your walls.
Top tips before you start
Before you get stuck into your picture hanging project, here’s a quick checklist of things to take into account to help avoid frustration later.
- Hang your pictures at eye level. Hanging pictures well takes a little advance planning – particularly concerning where to hang them and how high. Choose the right spot and then hang your pictures at eye level to allow them to be viewed more easily – and remember, eye level will be lower in living rooms and dining rooms where you mostly sit down.
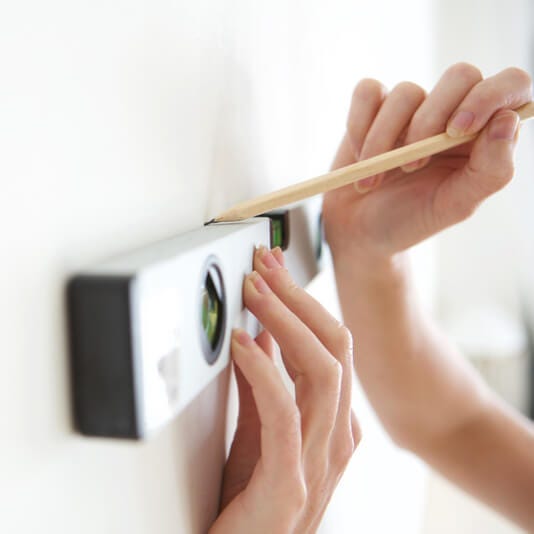
- Use a spirit level. There’s nothing worse than hanging a beautiful picture, only to step back and realise it’s wonky. Before you start hanging pictures, ask someone to hold the frame against the wall while you use a spirit level to make sure it’s straight. Then draw a faint line along the top edge of the frame to mark the position.
- Know your weight. It’s important to check that the picture hanging method that you choose is strong enough to hold your frame (particularly if you’re hanging a heavy picture). Do this to avoid disaster later!
Picture hanging without nails – step-by-step
What to use: If you don’t want to make holes in the wall, then you should hang your picture with picture hanging strips. They come in a range of shapes and sizes to suit picture frames, posters and canvases of different sizes and weights, and they can be used on painted drywall, tile, metal, wood and glass. Perfect for renters or anyone who wants to decorate damage-free.
Installation: Hanging pictures with picture hanging strips instead of nails is a quick and easy process. In fact, it only takes a matter of minutes. Follow these steps to ensure proper installation.


1. Clean the wall
Start by wiping your wall with a damp cloth to remove any dust or dirt.


2. Mark your position
Ask someone to hold your picture frame in position against the wall and then draw a light mark along the top centre of the picture, and use a spirit level to make sure it’s straight. You can use this line as a guide when you’re ready to hang the picture.


3. Attach picture hanging strips
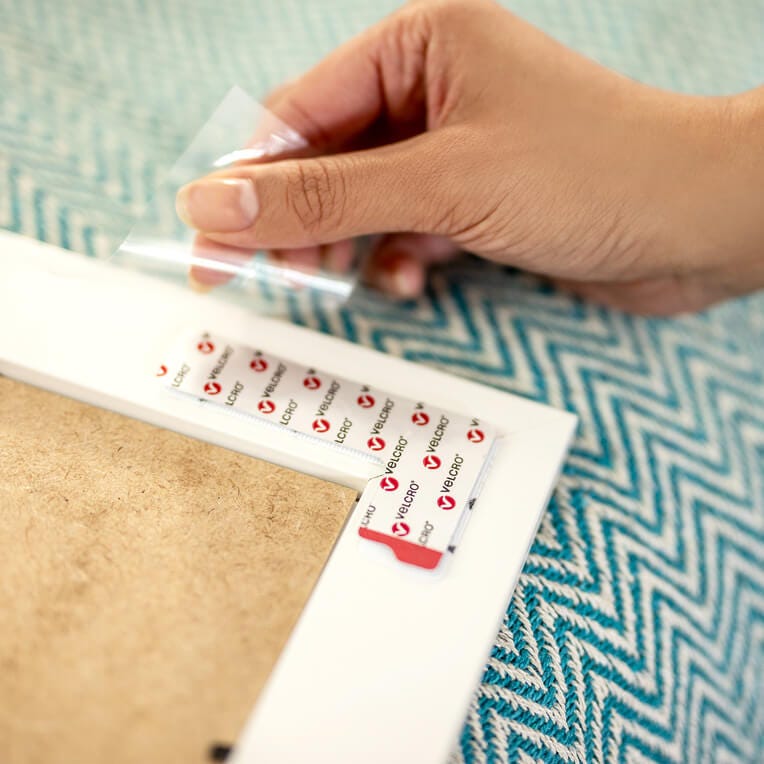
Put one set in each corner of the frame and do a final check that they’re strong enough to hold the weight of your frame (you’ll find this information on the pack).


4. Attach the frame to the wall
Press down firmly on it for 30 seconds to make sure the picture hanging strips are stuck down securely.


5. Slide the frame up and off the wall
Before you leave your picture hanging on the wall, it’s important to remove it for one hour to give the adhesive on the back of the picture hanging strips time to set.


6. Re-hang and check that the picture is straight
Last but not least, place your picture back on the wall and make any adjustments that you need to.
And that’s it! These picture hanging strips are made by the VELCRO® Brand and they’re quick and easy to use. Plus, they don’t leave marks, holes or damage your walls like traditional picture hanging methods. They’re also removable and easy to reposition, making it easy to swap your artwork around whenever you fancy refreshing your home décor!


